Building a Real-Time Chat Application with FastAPI and WebSocket
In this tutorial, we’ll create a real-time chat application using FastAPI and WebSocket. FastAPI is a modern web framework for building APIs with Python, and WebSocket allows us to establish bi-directional communication between clients and servers.
Prerequisites
Before we begin, make sure you have the following installed on your system:
Python (3.7 or higher)
pip (Python package manager)
Step 1: Setting up the Project
First, let’s set up the project and install the necessary libraries.
Create a new directory for your project, and navigate into it.
Open a terminal (Command Prompt, PowerShell, or Terminal) in this directory.
Create a virtual environment (optional but recommended) to keep the project dependencies isolated:
python -m venv venv
Activate the virtual environment:
- On Windows:
venv\Scripts\activate
- On macOS/Linux:
source venv/bin/activate
Install the required libraries:
pip install fastapi uvicorn websockets
Step 2: Setting up the FastAPI Server
Now, let’s create the FastAPI server that will handle WebSocket connections and manage the communication between two users.
Create a new Python file named main.py, and add the following code:
from fastapi import FastAPI, WebSocket

app = FastAPI()
from typing import List

from fastapi import FastAPI, WebSocket, WebSocketDisconnect
from fastapi.responses import HTMLResponse
from fastapi.middleware.cors import CORSMiddleware
from datetime import datetime
import json
# Dictionary to store connected WebSocket clients
connected_users = {}
app.add_middleware(
    CORSMiddleware,
    allow_origins=["*"],  # can alter with time
    allow_credentials=True,
    allow_methods=["*"],
    allow_headers=["*"],
)


@app.websocket("/ws/{user_id}")
async def websocket_endpoint(user_id: str, websocket: WebSocket):
    await websocket.accept()

    # Store the WebSocket connection in the dictionary
    connected_users[user_id] = websocket

    try:
        while True:
            data = await websocket.receive_text()
            # Send the received data to the other user
            for user, user_ws in connected_users.items():
                if user != user_id:
                    await user_ws.send_text(data)
    except:
        # If a user disconnects, remove them from the dictionary
        del connected_users[user_id]
        await websocket.close()


if __name__ == "__main__":
    import uvicorn

    uvicorn.run(app, host="0.0.0.0", port=8000)
Step 3: Creating the HTML File
Next, let’s create an HTML file that users can use to connect to the WebSocket server and send messages.
Create a new file named index.html in the same directory as main.py, and add the following code:
<!DOCTYPE html>
<html>
<head>
    <title>WebSocket Example</title>
</head>
<body>
    <h1>WebSocket Example</h1>
    <div>
        <input type="text" id="messageInput" placeholder="Type a message">
        <button onclick="sendMessage()">Send</button>
    </div>
    <div id="output"></div>

    <script>
        const userId = prompt("Enter your user ID (e.g., user1, user2):"); // Prompt the user for their user ID

        const ws = new WebSocket(`ws://localhost:8000/ws/${userId}`);

        ws.onmessage = function (event) {
            const outputDiv = document.getElementById("output");
            outputDiv.innerHTML += `<p>Received: ${event.data}</p>`;
        };

        function sendMessage() {
            const messageInput = document.getElementById("messageInput");
            const message = messageInput.value;
            ws.send(message);
            messageInput.value = "";
        }
    </script>
</body>
</html>
Step 4: Running the FastAPI Server
To run the FastAPI server and enable WebSocket communication, execute the following command in the terminal:
uvicorn main:app --reload
Step 5: Running the Chat Application
To use the chat application, follow these steps:
Make sure the FastAPI server is running in the terminal.
Open the
index.htmlfile in your web browser (preferably in two different tabs or windows).In each tab or window, the browser will prompt you to enter a user ID. Enter a unique user ID for each tab (e.g., “user1” and “user2”).
The WebSocket connection will be established, and you can now send messages between the two users.
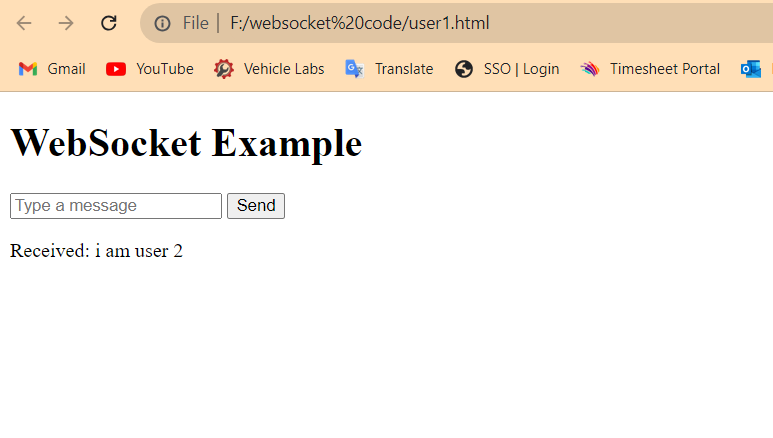
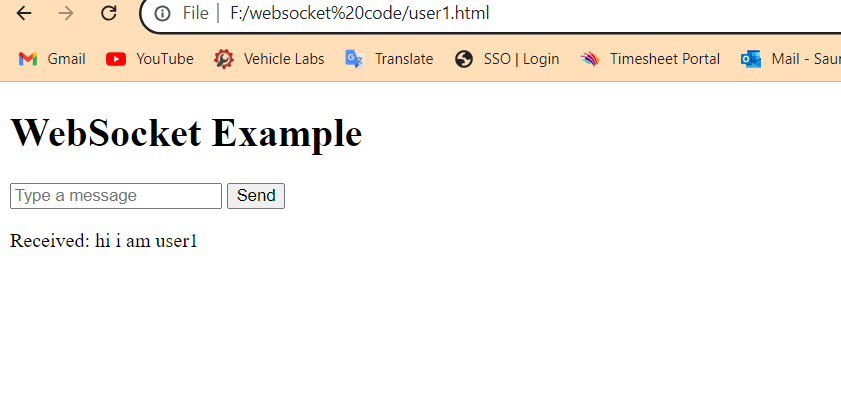
Type a message in the input field and click the “Send” button. The message will be sent to the other user, and the received messages will be displayed below the input field.
Congratulations! You’ve successfully built a real-time chat application using FastAPI and WebSocket.
Feel free to expand this application by adding more features, such as user authentication, message history, or message formatting.
Output:-

